Change Network Priority via Adapter Settings
Author: Maya Posted: 6 June 2020 Viewed: 9549 times Tags: #Windows 10 #Network
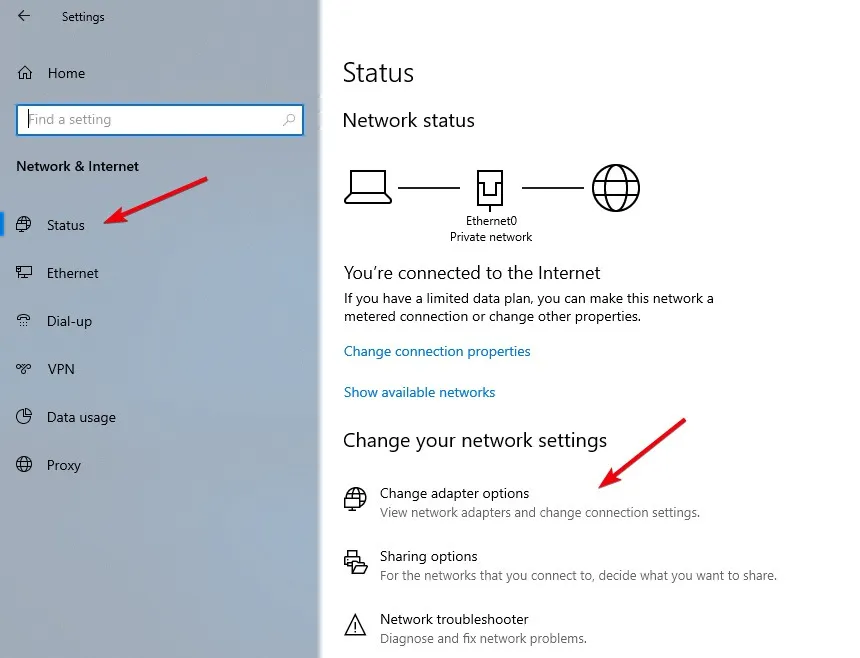
1. Open Settings.
2. Click on Network & Internet.
3. Click on Status.
4. Click the Change Adapter options item.
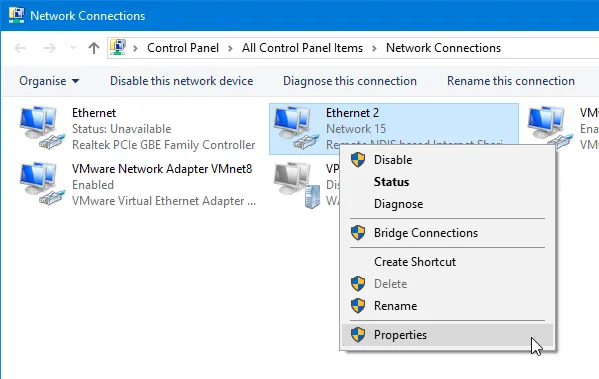
5. Right-click the network adapter you want to prioritize, and select Properties.
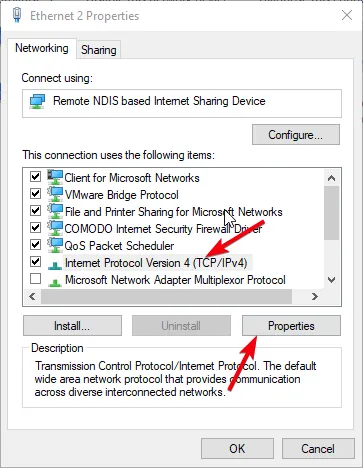
6. Select the Internet Protocol Version 4 (TCP/IPv4) item.
7. Click the Properties button.
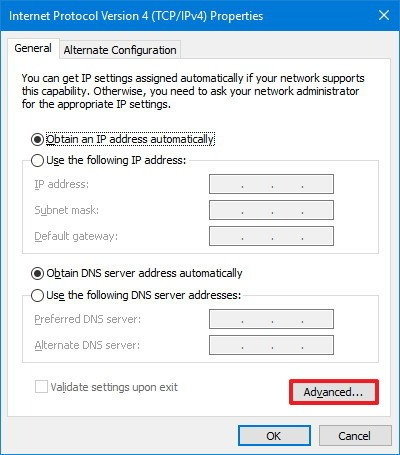
8. In the "General" tab, click the Advanced button.
9. Clear the Automatic metric option.
10. In the "Interface metric" field assign a priority value for the adapter.
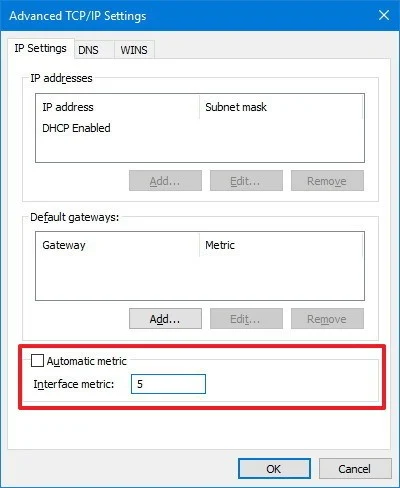
Note: The lower the metric number means higher priority, and a higher number indicates lower priority.
11. Click the OK button.
12. Click the OK button again.
13. Click the Close button.