FIX: Webcam issues on Windows 10
Step 1. Allow Camera Access to Apps.
1. Navigate to go to Start menu image -> Settings -> Privacy.
2. Select Camera on the left pane, and on the right:
a. Ensure that Camera access for this device is on. If not, click Change and set to ON.
b. Then set to On the Allow apps to access your camera switch.
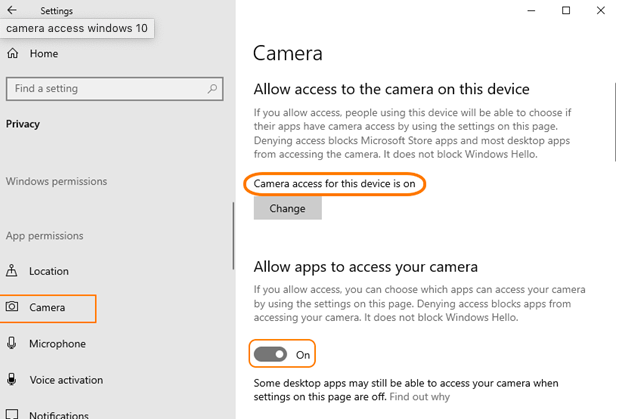
Now, scroll down, and…
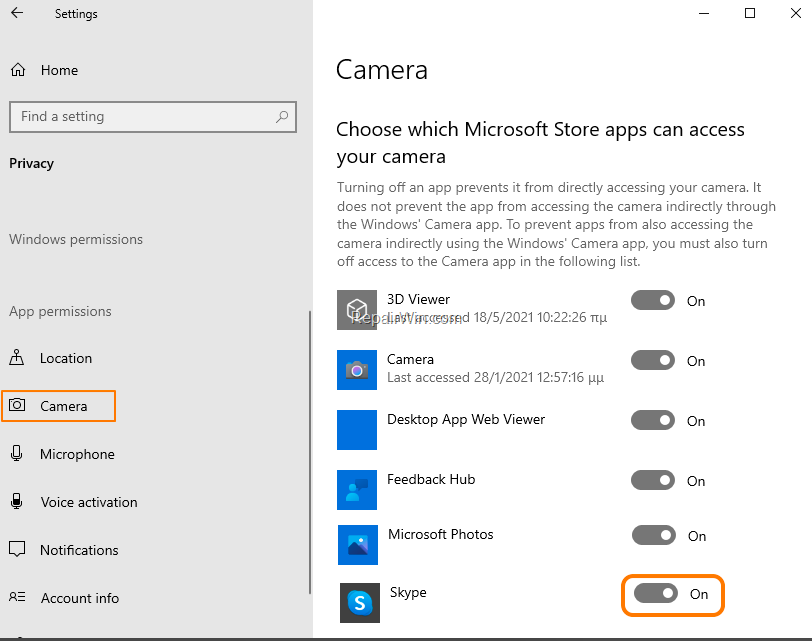
c. If you are experiencing the issue of the black camera screen on Skype store app, scroll down and at Choose which Microsoft Store apps can access your camera section, set Skype to On.
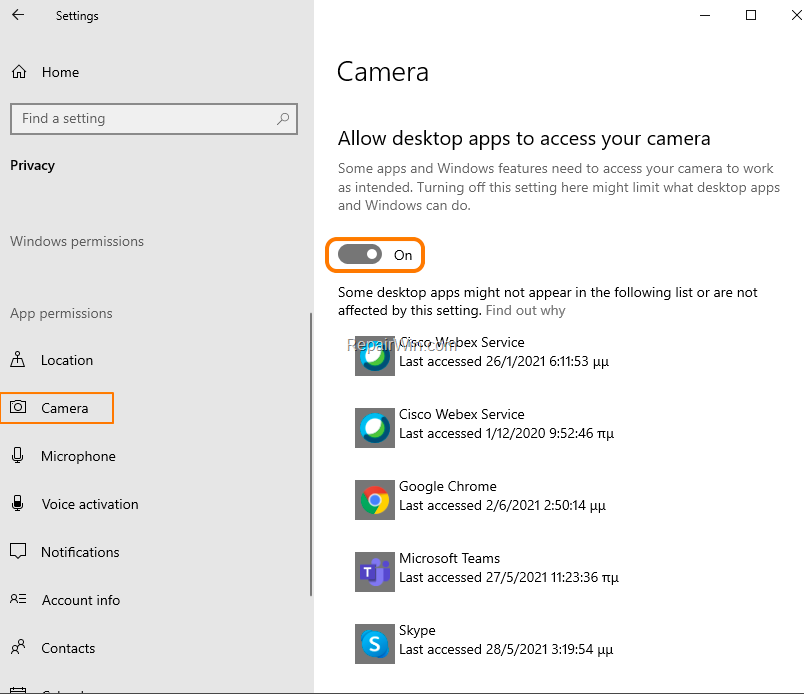
d. If you see a black screen window of your camera while using the Skype for Windows (desktop application), then ensure that the Allow desktop apps to access your camera switch is On.
Step 2. Check if your Camera is working properly.
One of the first steps in troubleshooting your webcam is to confirm that it works in the Windows 10 Camera app.
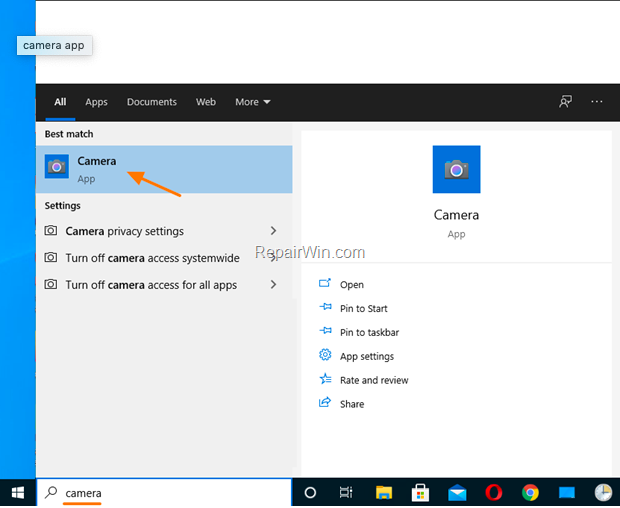
1. At Search box, type camera to open the Camera app.
2. Click the Magnifier and search for "camera".
3. Open the Camera application
3. Now, according the result, proceed as follows:
A. If your camera is working, you should see your image on screen. At this case, proceed and check your camera on Skype or in any other app you use it. If the Webcam doesn`t work or displays a black screen, apply the below steps in order:
1. Try to uninstall and re-install the application with the camera problem (e.g. Skype).
2. Proceed to Enable or to Disable the Frame Server Mode in Registry by following instructions on step-3.
B. If your camera doesn`t work either in Camera app, one of the following things can happen:
1. The camera device driver is incorrect or damaged. At this case proceed to troubleshoot camera drivers by following the instructions on step-4.
2. The camera is damaged and is not working at all. In this case, go to a computer repair shop to fix your webcam or use an external USB camera.
Step 3. Fix Webcam Black Screen issue in Windows 10 Registry.
If the camera is recognized and works without problem in some apps, but it doesn`t work in others, or displays a black screen on Skype, try to disable or to enable the "Frame Server Mode" in registry.
1. Open Registry Editor: to do that:
1. Press Windows 
2. Type regedit and press Enter

3. In Registry Editor navigate to the following key at the left pane:
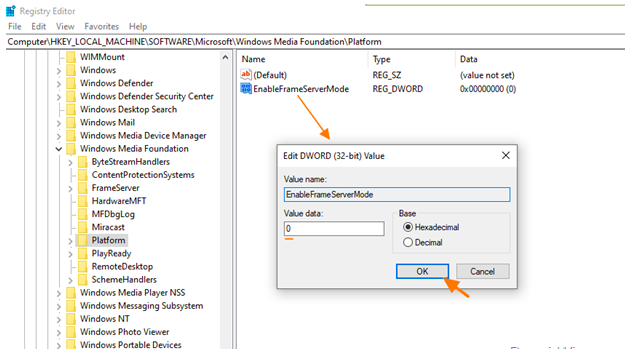
HKEY_LOCAL_MACHINE\SOFTWARE\Microsoft\Windows Media Foundation\Platform
4. Right-click at an empty space on the right pane and select New -> DWORD (32-bit) Value.

5. Give the name EnableFrameServerMode to the new value.
6. Double-click at the newly created value and make sure that the value data is 0. (Zero). Click OK.
7. Now, follow the same steps above (4,5 & 6), and make the same changes at this key:
HKEY_LOCAL_MACHINE\SOFTWARE\WOW6432Node\Microsoft\Windows Media Foundation\Platform
8. When done, close Registry Editor and restart your PC.
9. After restarting, launch Skype and check if the problem with WebCam has been solved. If not, follow the same steps, but this time enable the EnableFrameServerMode by changing its value from 0 to 1 and restart your PC again.
Step 4. Troubleshoot Webcam Driver.
The next step, to fix Camera problems in Windows 10, is to roll back or to uninstall/reinstall Camera`s drivers. 1. Open Device Manager. To do that:
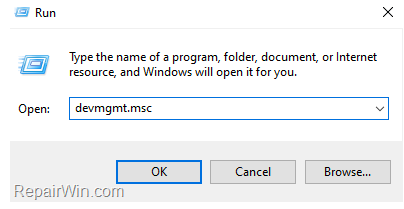
1. Press Windows 
2. In the "Open" box, type: devmgmt.msc & click OK.
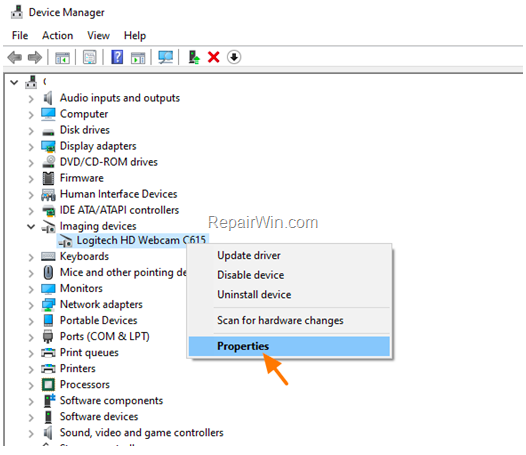
2. Expand Imagine Devices (or Cameras)
3. Right-click on your Camera and choose Properties.
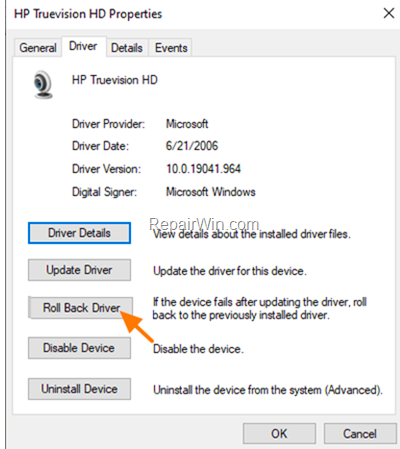
4. Select the Driver tab and proceed as follows according your case:
A. If your Webcam was working before, Roll Back Driver and restart your PC. Then check if your camera is functioning.
B. If your camera has never worked before, or if it is the first time that you try your camera (e.g. after a fresh Windows install), try the following in this order:
1. Click the Update Driver option, to check for an updated driver of your camera. If Windows finds a new driver, install it, and then check your Webcam. Otherwise…
2. Click Uninstall Device to uninstall the Webcam and then restart your PC. After restart, check if your camera is working. If not…
3. Navigate to your laptop manufacturer support site and check if its available a new driver for your Webcam and install it.
Additional Help to fix Camera Issues on Windows 10.
If you still have problems with your webcam after the above steps, try the following:
1. Install all available Windows 10 updates (Start -> Settings -> Update & Security and click Check for updates).
2. Update Windows 10 to latest version by using the Update Assistant. (To do that navigate to this link and click the Update Now button).
3. Refresh Windows 10.
That’s all folks! Did it work for you? Please leave a comment in the comment section below or even better: like and share this blog post in the social networks to help spread the word about this solution.